Pages

Showing posts with label Bathrooms. Show all posts

Thursday, March 1, 2012

Bathroom Part 3, continued . . .

When I finally revealed Part 3 of our bathroom projects, I mentioned how I was still on the fence about how to decorate the space. I love my color plan for the bathroom, but I know I need to add some artwork and accessories to tie in some of the seafoam and turquoise colors that are in our guest bedroom and hallway.

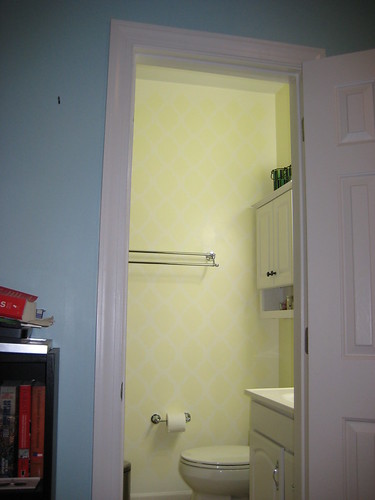
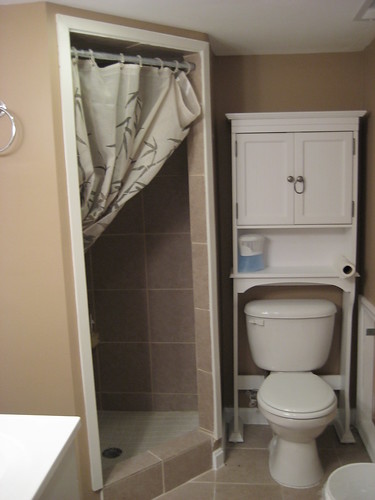
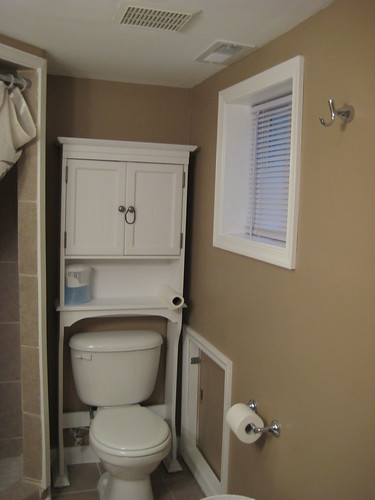
So, the big question now is, how do you decorate a bathroom anyway?

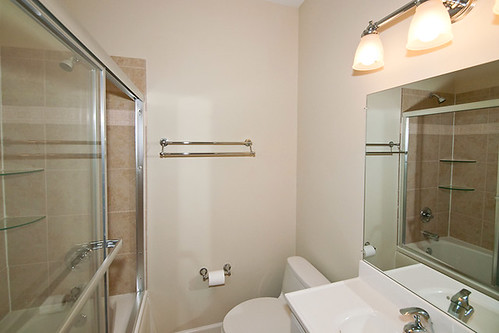
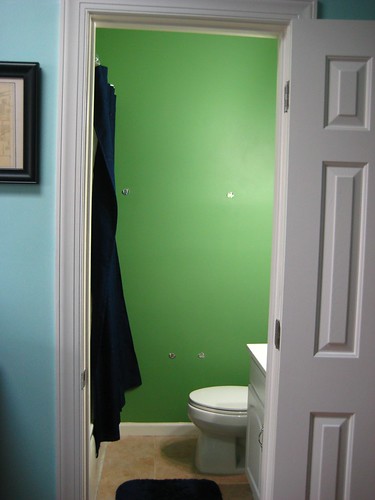
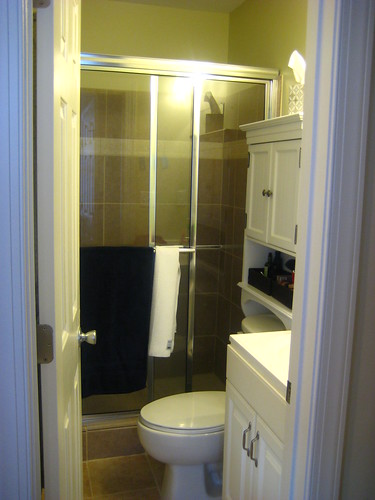
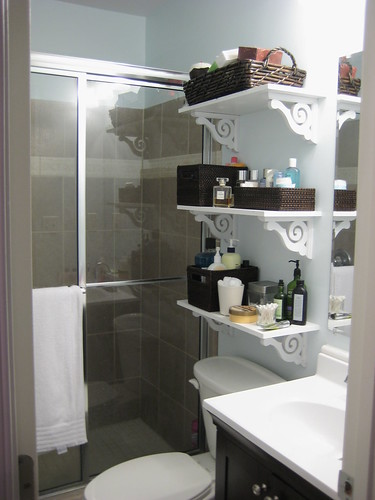
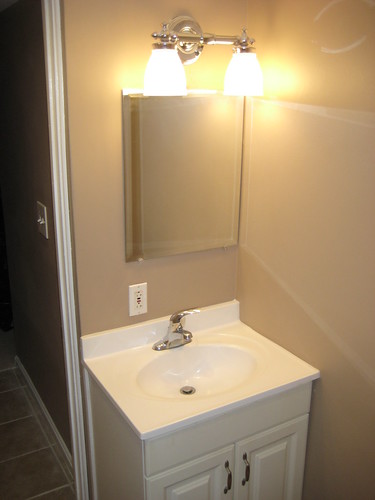
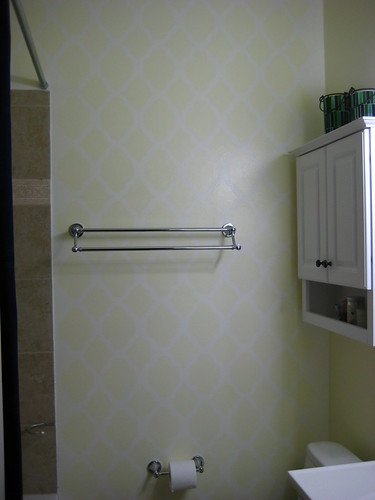
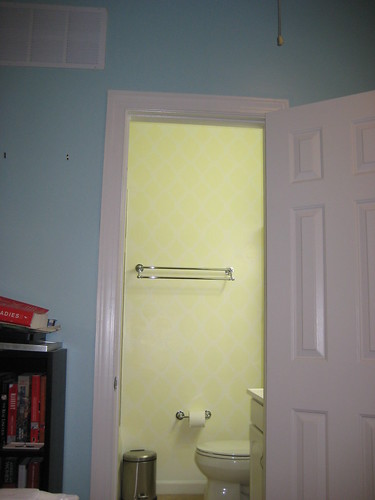
There is one main area that needs some pizazz - the space above the towel rack.Whatever I decide to put there will determine what I put on the cabinet, etc.

019

020

After careful consideration over the last few weeks, I have decided on four different options. Well, four themes to be exact (I like themes):

1. Travel theme
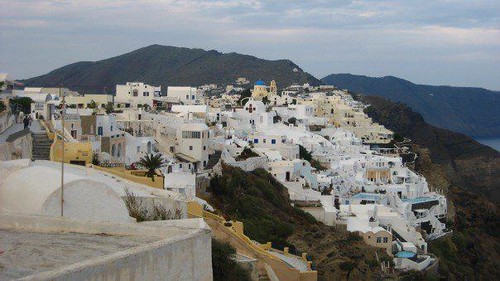
Like I've mentioned before (here and here, oh, and here), Chris and I love to travel. And, because of that I have tons of photos from our travels, but as you can probably guess, they are all just stored on our computer and hardly any are displayed anywhere in our house.

I thought it might be nice to "mod podge" a photo or two onto canvas and hang on that wall, kinda like this:


We have some great photos from Greece, like this one, that I think would compliment the colors pretty well.

santorini

2. Bathroom theme
I know, I know, this one is super original. No one has ever decorated their bathroom with a bathroom theme before, right? Well, I saw this cute idea on, where else, Pinterest, and thought 1) it's super easy, and 2) it's super cute.


All I have to do is get cheap letters from a craft store, some cute fabric or scrapbook paper, and mod podge it all together - voila! Plus, if in a few years (or months) I don't like it any more, I can always move them to another bathroom or our laundry area, or, pitch them since this would be a really cheap project.

3. Beach theme
Another incredibly original idea, right? Whoever thought of decorating a bathroom in a beach theme, huh? I think was patrolling Etsy for ideas when I came across these prints. Aren't they fabulous?!

Source: etsy.com via Kristin on Pinterest

Source: etsy.com via Kristin on Pinterest


I thought they would look awesome in crisp white frames, or even in dark teal frames and white mats. Plus, they are obviously beach-themed, but they are fun, obviously vibrant, and a more youthful. I mean, who wouldn't want those bathing beauties smiling at them every morning?

4. Presidents theme
Now this is an original idea for bathroom decor, am I right? Presidents?!

So, the background story is this: while our main floor is taking on a map-theme, our second-floor is gradually developing a Presidential-theme. It's only fitting for two extreme history nerds I tell ya. First, we have a small bookshelf outside of this guest bathroom that has quite the little Presidential library developing, including an insanely cool Lincoln bobble-head my sister got me for Christmas. Then, recently we put together a 1000-piece President puzzle that I am mod-podging to hang above said bookshelf. President-love overkill? I think not. Lastly, Chris' mom gave us some awesome b&w sketches of Presidents' homes that I plan on hanging in the guest room (more to come on that later). Since the guest room, hallway, and bathroom will all share the same color scheme, why not share a President's theme? We heart America.

Picture this: President silhouettes, hanging in the bathroom. Kinda like this, but obviously with Presidents:


I'm totally thinking of finding some awesome oval frames, spray-painting them a deep teal color, and popping in a silhouette of some of our fav Presidents. Can't you picture Washington or T.J.'s ribboned-ponytail silhouette'd and staring at you as you shower?? Awesome, right?! (Or, do you prefer the bathing beauties up there?) I definitely think this option would be the most fun, for us at least, and is kinda strange and unique, in a sophisticated way of course.

So, what do you think? Which theme should I go with? And, how do you decorate a bathroom besides towels and soaps?

PS -  What did designers do before Pinterest?!? Seriously.

Oh, and PPS - When you embed an image from Pinterest, how do you get the caption credit to center too? I've tried entering the "text align: center;" code, but it doesn't seem to want to work for me - what am I doing wrong??

Thursday, February 16, 2012

Operation Finish Bathrooms: Part 3

It is now, finally, time for the final installment of Operation Finish Bathrooms (for now). I've already shared how we Chris re-did our cruise-ship-sized basement bathroom in the first installment, and I've also shared how we made our master bathroom semi-sophisticated in the second installment, but now it's time to reveal the heart of all my bathroom-decorating woes and Operation Finish Bathrooms Part 3: Our Ever-Changing-And-Never-Finished Guest Bathroom. (and beware, this is a LONG one, sorry!)

So, you might remember my dilemma late last summer? At that time, I had just painted our guest bathroom green, to match some candle holders I got on sale at World Market and I pleaded for help in developing a color scheme. Well, I finally decided on a color. But then, I decided that that color made the bathroom look like a circus tent. So, I picked a completely different color scheme. And now that I like the colors, I am still stuck once again! I've mentioned I'm indecisive, right?

How about I start from the very beginning . . . .

When we moved in, this is what our guest bathroom looked like. Plain jane, with builder beige colors on the wall, and even a glass shower door.

guest bath

Then, as you might remember, I bought these great candle holders and decided to paint the guest bath green and stencil a color over it. I sought your help in deciding what color to stencil in.

004

Everyone had great suggestions, but I was still torn on what color to stencil in, so I played around with paint chips and waited. "Waited for what?" you're probably asking. I guess I was waiting for that "light-bulb" design moment where it all makes sense. Needless to say that didn't happen and I was anxious to do something, so I picked a color anyway and went with it.

Bad idea, at least when you are doing something as laborious as stenciling. . . For novice-stencilers out there, I would NEVER RECOMMEND stenciling a bathroom as your first attempt at stenciling. Why? It seems so easy, right? Sure, it's really easy to stencil a square or rectangular wall, but throw in tiling, fixtures, toilets, and cramped quarters and you have a recipe for disaster, if not a LOT of frustration.

It took me about a month, maybe, and I don't want to even guess how many hours, to stencil this far. (And, oh yeah, I picked a lighter green to stencil, surprise . . . )

033

You think it looks good, right? Wrong. It looked bad. B-A-D, bad. Sure, from this photo it looks good, well, decent (let's be honest). But up close, like you would be if you were sitting on the "commode," the lines were not crisp and clean at all. Eck!

036

No matter how thinly I put on the coats of paint, it still globbed-up and smeared in places. Then, I had to free-hand the corners and edges because of weird bathroom angles and what free-handing of the stencil I had done looked scare-ry! Eek!

035

I was finding myself working on it every night after work and all day on weekends. Mind you, all of this work was for a bathroom, and not just any bathroom, but our guest bathroom that I don't even use. Plus, all of those bright colors started to take on a circus-y kind of feel, which is definitely not what I had intended. And, to make matters worse, I was constantly asking Chris if it looked bad and, bless his poor-husband-soul, he would say it looked "okay" while his face looked horrified. Not a good sign, ladies (and gents). Not a good sign at all.

I eventually gave up. It was too much work and had tested the limits of my decorating- and DIY-patience. I needed to step away and wait to be re-inspired.

In the meantime, I moved on to other home projects - like hanging up new dining room art, having fun with some chalkboard paint in our kitchen, painting chevrons in our guest bedroom, and even planning our master bathroom decorating.

FINALLY, the design-lightbulb flickered in my mind (just flickered) and I realized that I wanted similar color schemes in our second-floor hallway, guest bedroom, and guest bathroom because as you walk up our steps you see all three. I wanted them to be cohesive and not clash. I didn't want a cornucopia or rainbow of color to blind my guests, or me, but something that was complimentary. 

As you might remember, our guest bedroom is already yellow and white with turquoise/seafoam accents. So, I once again went back to this color scheme that, for us, is equal parts sophisticated and fun. (Thank you, Pinterest and Oh Hello Friend!)


I can't seem to get away from yellows paired with seafoams and white. Thank goodness seafoam/aquamarine is the color of the season!

So, I decided to paint over the green, and the stenciling, and start completely over. I sanded the walls to smooth out the stencil lines and then primed (it took a good 4 coats). Trust me, for a room as small as a bathroom it was still very time consuming and I cannot believe I decided to start over!

038
Sexy, right?

041

I ended up painting 3 of the walls Behr's Capri Cream (light yellow), and the focal wall Behr's Cotton Fluff (off-white).

047

Then, I stenciled just the focal wall, to avoid the stupid corners and edges, in the same Capri Cream/yellow color. Stenciling just the focal wall was the best decision ever since it only took a day to complete! And, I think it looks pretty gosh darn good . . .

019

I actually love how faint the stenciling looks - not only does it kind of give a honey comb look to the wall from far away, but it also hides some of my stenciling mistakes!

018b

And, I really really love how pretty the yellow bathroom looks with our seafoam/turquoise-y hallway walls!

021

The lesson I learned from this experience is two-fold - 1) Stenciling is hard; 2) But things can easily be painted over (it might just take some sanding and a whole gallon of primer)!

So, at the beginning of this post (and probably 15-minutes-worth-of-reading ago if you made it this far) I mentioned how I am stuck once again, and it's pretty obvious from these photos that the bathroom is sparse and needs some accessorizing. I'm the process of brainstorming some ideas to share with all of you, but I figured that this post was long enough, so, details on that are to be continued . . .

(And, in case you are wondering, I used the Rabat Allover Stencil from Cutting Edge Stencils

Thursday, January 12, 2012

Operation Finish Bathrooms: Part 2

Before the holidays I shared with all of you the fact that we had almost finished all of our bathroom projects and that we had completely  finished Part 1 of Operation Finish Bathrooms: Our Not-So-Tiny-Anymore Basement Bathroom! Well (drumroll, please!), now I am ready to share with you Part 2 of Operation Finish Bathrooms: Our Semi-Sophisticated Master Bathroom!

When we first moved into our house, our master bathroom was the least of my concerns and definitely wasn't on my "design radar." I knew that I would eventually want to paint it, and maybe switch up some hardware or something, but other than that it was pushed out of our minds. That is, until we started working on our basement bathroom.

See, our basement bath vanity was small. Think, 17 inches wide small (which is smaller than my half size desk calendar at work!). But, since we were making the basement bathroom bigger, we wanted a bigger vanity too. Luckily, our master bathroom vanity was the perfect size for our bigger basement bath, so we decided to move it downstairs and buy a nicer vanity for our master bath! Of course, shopping for a new master bath vanity got my design juices flowing and now our master bath is much nicer, or semi-sophisticated!

Here's where I pretty much left our master bathroom soon after we moved in . . . (and my apologies for the yellow-ish lighting.)

157

We bought a cabinet to put over the toilet and that was about it. Bor-ring. But functional and, most importantly, clean.

Like I said though, my designer-brain was working up a storm on this bathroom and I decided I wanted to do subtle horizontal think stripes on the walls. Stripes on walls seems to be pretty popular out in the design-world, so I figured I would jump in too. (Plus, they'd match the chevron stripes in our guest bedroom!) Now, when I say subtle, I mean sub-tle. See . . .

107

Really, do you see them? Hint - look for a stripe right above the shower tiles . . .

I did the stripes in a flat and a semi-gloss of the same light blue paint (Ice Folly by Behr to be exact), so while it's really hard to capture on camera the flat vs. shiney-ness of the blue is just subtle enough in person. And, just for your information, I didn't do different colored stripes because I really wanted a subtle look and our bathroom is so tiny that I was afraid that too much color contrast would make it seem like a fun house instead of a sophisticated bathroom. (Any synonyms for "subtle"?)

Anyway, on top of painting stripes on the walls, Chris and I changed the cabinetry. While we were moving the vanity to the basement, we also moved the toilet cabinet to the basement too. Then, I bought wooden corbels and shelves from Home Depot, spray painted them white, and Chris threw them up on the wall. Ok, so he didn't throw them up on the wall - it wasn't that easy - but I'm not going to go into those boring and messy details . . . see, see, aren't our new shelves pretty!

106

I'm still trying to organize our "stuff," but I really like how it still gives us me room to store lotions, face wash, etc. and yet feels so much more open!

105

Like our new vanity too? It's still not too fancy, but definitely more our style than the basic white one.

So, that's it. That's Part 2 of Operation Finish Bathrooms!! And, I've saved the best for last, our guest bathroom, so stay posted!

Tuesday, December 20, 2011

Operation Finish Bathrooms: Part 1

While all of you (or most of you I would guess), were gorging on turkey, watching or playing football, and Black Friday shopping, Chris and I were hard at work on 3 of our 3.5 bathrooms. The TLC that each of them needed was long overdue, so we decided a few weeks ago to dedicate our entire Thanksgiving break to finishing up our bathrooms, finally. (This decision trumped our initial idea to spend the entire Thanksgiving break camped out in front of the TV re-watching LOST. Oh, the woes of homeownership....)

We spent 4 days over Thanksgiving sanding, priming, painting, taping, painting, cleaning, etc. our basement, guest, and master bathroom. Fun, no? And, believe it or not, we still aren't completely finished. Although, we are much closer than we were a month ago!

So it's time for Part 1 of Operation Finish Bathrooms: The Once-Cruise-Ship-Sized-Dreaded Basement Bathroom!

The most troublesome bathroom from the moment we moved in was the one in our basement. It was ti-tine-ey. Seriously, cruise-ship bathroom size, if not smaller. Too small to even take an okay picture of it. And, we realized shortly after we moved in that water was leaking in near the bathroom right onto our carpeted basement floor. Want mold? No, thank you. As I wrote about way back when, we spent last fall and winter making the bathroom bigger, thanks to some door maneuvering. Since then, Chris has been painstakingly patching up the leaks, re-bricking parts of walls, waterproofing, tiling, plumbing, electrical work, drywalling, mudding, painting, trimming, etc., all when he's not laboring away on statistics homework. Fun, no? Here are some pictures of all that fun . . .

Here's the bathroom last spring, after we moved the wall making it bigger, but before we found the water leak. (The gap in the tile floor is where the old wall was before we made it bigger.)

017

Then we realized that water was leaking in from under our outdoor steps and through the bathroom, so those pretty walls had to get torn down to find the leak.

043

Yup, this is rotting wood that was behind the bathroom drywall. Gotta love water damage over years and years and years.

047

And, here's more rot. Oh, and see that hole that's under our outdoor steps? Yup, that's where the water was getting in. Notice the rotted wood in the bottom of the whole. Gross.

059

Chris cleaned up the hole and sealed it from future water trickling in. Much nicer looking.

060

Since we moved the wall out, we also had to fix the light switch and put up the new dry-wall. Pretty much the entire bathroom got new drywall. Some walls got new drywall twice. Lucky us.

018

Here's the extensive list of what we Chris accomplished in the basement bathroom:
  •  Re-framed the new bathroom entrance and door after we moved the wall out.
  • Discovered the water-leak culprit: a strange empty space under our outside stairs.
  • Cleaned out the space under the stairs, waterproofed it and bricked it up.
  • Created a door to access the space = new storage!
  • Put in a new vanity and sink (we used the one from our master bath, more on that in another bathroom segment!).
  • Re-drywalled the entire bathroom, including the ceiling. Mudded it, then painted it.
  • Put in a new light switch for the bathroom.
  • Re-framed the bathroom window.
  • Re-tiled parts of the bathroom and the area outside of the bathroom.
  • Added trim everyway.
  • Cleaned the bathroom, which was covered in dust. Bleh.
  • Put on a new toilet seat cover. Fancy, I know.
  • Re-hung the old fixtures, and added some new ones (towel racks).

And, voila! Here is our new and greatly improved basement bathroom!

060

Notice the door next to the toilet. That's the hole we found under the stairs that is now extra storage!
059

Check out our nice recycled vanity from our master bath. The mirror might be off-center, but it's a basement bath, who cares!
063

Our lazy-selves are relishing in the fact that we can now actually use the bathroom in the basement while we are down there watching TV and working out, instead of running upstairs! Yippee!!

So, that's it. Our basement bath is DONE. Done, done done!

Part 2 of Operation Finish Bathrooms will be coming soon . . . (as soon as we hang up shelves and clean!) So, stay tuned!

Monday, August 8, 2011

Green Bathroom!? Help!

In less than one week we will have been living in our house for 1 year and there are a few projects that I want to wrap up before that looming "anniversary" date. One of these projects includes our guest bathroom, and while I have ideas for the bathroom in my head, I need your help making those final decisions (because sometimes I cannot make them)! And really, besides Chris, our guests (you) will be using it! So, how would you like your guest bathroom?

Okay, here we go... First, I have a navy blue shower curtain that I love and want to keep, AND, I found these two absolutely great candle pillar things that gave me inspiration for that space that I want to use in there as well (see photos below). So, a couple of weeks ago I decided I wanted to stencil the bathroom! I've never stenciled before, and I figured our small-ish guest bath would be a good place to start. Using the "candle pillar things" as inspiration, I painted our bathroom green as the base paint to the stencil (Martha Stewart Rhododendron-green to be exact).
Green walls, navy shower curtain.

Pillar candle thing, green walls, navy shower curtain.
 I have also picked out the stencil - the Casablanca allover stencil from Cutting Edge Stencils.

Casablanca stencil. Swoon! (source)
 Soooo, I have the base paint, I have the stencil, but now I need help deciding what color to paint the stencil and I don't think I can do it alone! I know, the green base paint is pri-tty overwhelming. We have loooovely tall ceilings in our bathroom that make it seem surprisingly bigger than it really is, and this green is literally weighing everything down. I know my stencil MUST be a lighter color to open things back up, but what color?

Perhaps, white? It would end up looking something like this with the green base paint as the stencil outline....
(source)
Or, perhaps, just a lighter color green in a higher gloss, similar to what Lovely Crafty Home did...
(source)
Or, should I be bold and go with another color, like Martha Stewart's Seaglass? (It would blend well with our hallway color and our guest bedroom color which both have seafoam-y greenish-blue hues...)
(source)
Here's the bathroom currently with the candle pillar thingy, for reference...

Is the seaglass color too much? I'm afraid if I go with white it will be a lot of white with the all-white tub, toilet, vanity, and cabinet? Is a lighter green still too much green?? Maybe I should do a builder beige color to blend in with our tile???

Lastly, did I screw myself with spending an afternoon painting the bathroom green? Should I scrap the green and start over?!? HELP! Any and all suggestions, advice, guidance would be MUCH appreciated!

 (In other news, I did finish painting our guest bedroom, which WAS successful and I am absolutely in love with it and WILL be posting about it asap!)

Tuesday, February 15, 2011

What a mess. (aka, our basement remodel)

When we moved into our new home 6 months ago we knew that our first project would be tackling our basement. Don't get me wrong, our basement was finished, complete with a granite-countertopped kitchenette, BUT, we had a MAJOR problem... We couldn't get anything into the basement! (and there was a leak somewhere, which we figured out ...) We had big dreams of a basement "frigerator" for Chris' stock of beers and a huge comfy sectional for movie and game watching, but unfortunately we couldn't even get our futon frame down there without taking it completely apart. So, we decided that first weekend that fixing the basement was #1 on our priority list - how else were we going to get our sweet sectional and fridge down there?
Long story, short, we decided that our only option was to re-design the back half of our basement. The photos below are our "before" shots. Note the window, the tiny hallway to the left of the window (that led to the bathroom and backdoor), and the backdoor itself which, in combination to the tiny hallway and its relation the back stairs, made it impossible to get furniture down to the basement. Ergh.

Back of the Basement
"Before" Inside

Back stairs
"Before" Outside
Confused by all of this? Yup, so were we. And a lot of contractors. Needless to say, we needed help re-designing this mess of a basement doorway. We found an awesome contractor that made the window into a door, and the silly door into a wall. Ta-da! Now doesn't our new door look more "normal"!? (And, thanks to the new door, we got our dreamy sectional into the basement!)

New Back Door
"After" outside!!
From there, handy Chris, who had been dying for a home project, decided to make that tiny hallway part of the bathroom. I mean really, we didn't need a hallway that led to a cruise ship-sized bathroom, did we? So, Chris tore down the hallway wall that separated it from the bathroom and moved the bathroom door. You can't believe how much bigger that bathroom looks and feels! As you can see from the photo below, even our kitties are in awe of the changes! And, if you look close enough to the floor of the current bathroom, you can even see the mark on the floor where the hallway wall was a few weeks ago! Believe it or not, our basement bathroom is now the largest bathroom in our house. Which we I think is a good thing!
Basement bathroom
"After" bathroom
Now, instead of a window and a tiny hallway along the back wall of our basement, you see a wall of doors (and my treadmill). And don't worry, after the bathroom is tidied-up, we're going to paint the brick so you don't have to look at the awful 1920s green glue residue.

Basement
"After"

(here's the "before" shot again!)

Back of the Basement
"Before"

And, if you noticed in the "after" photo above, while Chris was busy working on tearing down the hallway wall and re-framing the bathroom door we also took time to paint our basement. We wanted to go for the movie theater-look, so we decided to go dark, navy blue dark . . . We love it! When we turn the lights off to watch a movie everything is dark except the screen. It's the cheapest (or most expensive) movie theater experience we could have asked for!

Basement
Ohhh!!! Ahhh!!!
The end.

So for all of you that made it to the end of this VERY long blog post, you are welcome to come visit us in our new home and enjoy our almost-finished basement as much as we do!
Related Posts Plugin for WordPress, Blogger...