Pages

Showing posts with label Pinterest. Show all posts

Monday, June 11, 2012

Extreme Makeover: Office Edition

So, I don't know if I've ever shown you our office? Nope, I just checked all of my old posts and while I've mentioned the office (in regards to the water leak we discovered after the hurricane last fall), I've never shown you the office. Probably Mostly because it was embarrassing. I am a neat freak and the office was anything but neat. It was more like a graveyard for crap (pardon my language). Our office was so bad that I actually would avoid using it. I would even use our archaic laptop to do work instead of our nice desktop, that I purchased, because I didn't want to go in the office.

Well, as I mentioned last week, I've been training for my summer teaching position and a majority of the training up until last week had been at home. The training required me to be at a computer watching videos, taking quizzes, participating in conference calls, reading materials, etc. a.k.a., I was actually going to have to use our office . . . which meant I was going to have to straighten that sucker up. (I'm one of those people that cannot work in an untidy room. I will seriously clean before I study/work.)

So, I spent a good two days clearing out the room, scrubbing it down, and putting things back in place. If you follow me on Instagram you probably saw this photo a few weeks back:


This was taken mid-clean, after I had taken everything out of the office and piled it all in the hallway. It was a dusty mess of books and random other stuff, like the cat drinking fountain box and a burgundy-colored crocodile-print briefcase . . . again, random stuff.

But, now it's time for the big reveal . . . and don't worry, I'm sharing the "before" and "after" shots so you can see how horrendous it looked before and how extreme of a makeover/cleaning job I did!


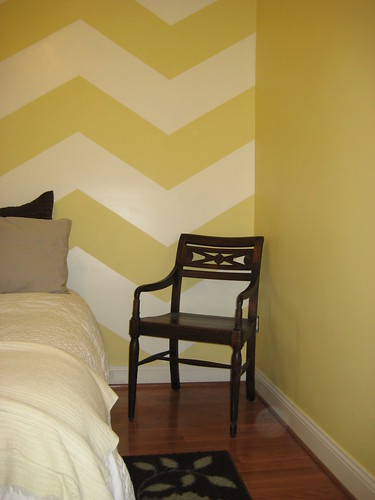
As you can see, not only did I remove the ladder and get a chair, but I organized our filing and the contents of all those boxes and bags.

Quick note on the chair. I have wanted an Ikea Poang chair for a few years now, but I could never muster up the courage to spend $100+ on the one I wanted. Now, if you've never sat in one, you need to find one and plunk your butt down because you'll understand why I've wanted one - they are coooooommfy. A few weeks ago though, I just happened to be searching craigslist for random stuff (like a retro metal bar cart) and realized that I should search for a Poang chair . . . A couple of days later I nabbed this beauty for $30! If you were to buy this chair straight from Ikea, it'd be about $150. Bar-gain!! And, it's in great condition! Anyway, back to our office makeover . . .

Then I had to tackle the bookshelves . . .


. . . oh, the books! Now they are finally all back in order on the shelves (by "type," author, chronology, etc.), the shelves are dusted, and the random piles of stuff have been contained (notice I didn't say removed!)!

Lastly, I conquered our desk, which pretty much meant organizing the piles of stuff on it. Easy stuff compared to the bookshelves.


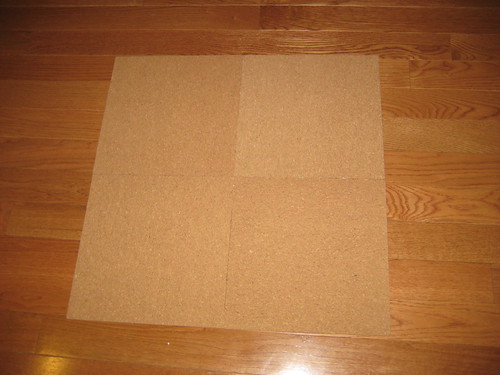
Oh, and if you notice something different in the "after" shot, it's probably our diplomas that I finally hung up (because what office is complete without the diplomas?) and the teal-painted herringbone cork boards I made (thank you, Pinterest)! Here's a closer view of the cork boards if you're curious . . .


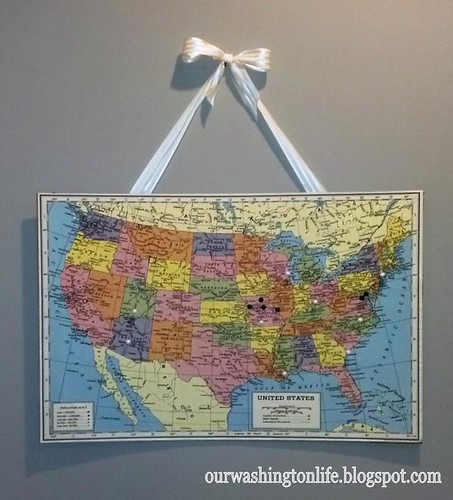
 They were super easy to make. I just bought four cork tiles from Target (the same ones I bought for my cork travel map that cost about $9), measured and taped off the herringbone design with painter's tape, took the tiles outside, and gave them a good three-ish coats of spray paint. I think this was one of the best projects I've done in a while - cheap, easy, and completely customizable. My mom mentioned that these tiles might be good for the side of a stainless refrigerator to hang invites or notes, that way you don't have to hang stuff on the front and potentially scratch the surface. Genius! Plus, you can do whatever design and color you want.

Also, if you noticed and like my uber-cute desktop background with the fun chevron pattern in the first photo, you should check out Atomicdust's blog (my sister, Danielle, works for them). Every month their designers take a break from client work to craft some seriously awesome desktops to download for FREE for your computer, iPad, and smartphones. LOVE them!

Anyway, that's our extreme makeover: office edition! It didn't require any painting or big furniture purchases, just some TLC, and a few days off work! Maybe someday we'll add a rug or a footstool for my Poang chair, but for now it's back to work in my clean and functional office . . .

Tuesday, May 1, 2012

Vertical Gardening

 One of our #1 requirements when we were house-hunting was to have some kind of a backyard, or whatever kind of a backyard we could get in the city. We knew it was a long-shot in finding a place with enough green space to warrant a real lawnmower, but Chris really just wanted a back "yard" to plant some herbs, relax on our adirondack chairs, and grill. That's really it. We eventually ended up putting a contract down on a short sale house that had absolutely no backyard. Imagine that. But, thankthegoodness we got tired of waiting on that short sale and fell in love with our current house, because it has a nice little backyard patio! No grass, but areas to plant some things, to sit in our chairs, and grill!

Last year, we worked on converting some of the greenery on the patio from bushes and flowers into a little herb garden of rosemary, chives, sage, parsley, dill, and oregano. It was our first time "gardening" and we definitely learned a lot. For example, did you know that dill grows out of control? Oops.

So, this year we decided to be a little more methodical in approaching our little herb garden, aka, not planting everything in the ground and giving them free reign to grow! I had been inspired by others' garden projects that I found on blogs and Pinterest and thought that something similar would be perfect for our little "yard"!


I figured that making some kind of vertical garden to hang on the brick wall at the back of our patio would not only hide the ugly, and boring, brick, but it would also make our herb plants inaccessible to the little herd of alley cats we got going on in our neighborhood. As you can guess, it wasn't hard to convince Chris to do a projects that required measurements and using tools either!

First, let me say that you can obviously literally do a vertical garden however you want, just look at those ideas that I found. They can be hung, stood, or leaned on a wall. It can be made of clay pots, mason jars, and even gutters. It'd be perfect for people who want a little planter garden in their huge yard, and even better for those of you with tiny apartment balconies. It's really what works best for you.

What we decided to do was hang ours on the brick wall at the back of our patio. We used clay pots we bought last year, some pine boards we picked up from Home Depot, "L" brackets to hold it all together, a little paint to make it pretty, and some thick rope to hang over the ledge of the brick wall, and voila!

007 003
004
005

 As you can guess, this project was really pretty simple, especially since it was completely customizable. Chris, being the "builder" of our relationship, drew out the plans, gathered the materials, and put it all together based on what we thought would work best for our yard (aka, cover up the brick wall). All he had to do was cut the pine board into the right lengths and screw it all together. He used the "L" brackets to reinforce the shelves to the back so that it could support the clay pots and plants. The shelves may not be that pretty from the inside, because of all of the brackets and whatnot, but the paint and plants cover them up just fine and at least it won't fall apart!

021

Chris also used some thick rope to hang it over the top of the brick wall. We figured this way it'd be easier to take down to store next fall.

006

If you want to build a vertical garden just like ours, Chris gave me some pretty detailed notes to share: Vertical Garden Assembly Instructions. The notes might even be too detailed, but that's Chris for ya!  ; )

 Oh, and if you are curious about what I did to contribute to this project, besides being inspired by Pinterest, I painted the darn thing! Behr's California Poppy to be exact. It's not the best paint job in the world, but I only used half the quart I bought for it so at least I can touch it up year to year.

And, you might think that I created the cute little plant labels on the shelves, but I didn't, Chris totally did. It was his "idea," so I gave him the supplies (white spray paint and a blue acrylic paint pen) and he went to town with some scrap wood. He even made little label stakes for our herbs in the ground.

011

Our back "yard" patio definitely looks complete now that we have something fun hanging up on that brick wall. And, in case you are in awe of our awesome Adirondack chairs, Chris definitely built those, from scratch, for us when we first moved out here to DC! (Oh, and those cute yellow and white pillows were from KMart. I'm super proud I found them!)

010

So, that's our vertical garden. Super simple, but perfect for a second try at our herb garden, even if we don't have a "yard" to plant anything in!

Oh, oh! And, look at these bad boys . . .

002

Do you see them in that little cluster in the center of the photo? Baby strawberries!! Cross your fingers that our alley cat friends (I'm talking to you Clipper/Homie Half Ear/Socks) don't snack on them before we can!

Friday, April 27, 2012

Dear Hand-Me-Down Dresser Gods

Dear Hand-Me-Down Dresser Gods,

I am searching for a lovingly-cared-for-but-no-longer-wanted dresser for our guest bedroom. I would love to have it in time for my parent's visit in mid-May so that I can progress in "finishing" our guest bedroom. See, it just looks so bare without some kind of a dresser to store linens, travel products, and other knick-knacks.

001
002
003

Said dresser would look fabulous with an equally wonderful mirror above it and those lovely aqua-spray-painted thrift-store sconces on either side of it, adorned with crisp white candles.

018

I am looking for something like these that I can "upcycle" with a nice coat of paint and some new hardware.


Can you please request that the DC area Craigslist, Goodwill, and other area thrift stores that I frequent make some available for me to purchase? Preferably in the $40-80 dollar range, with working drawers, solid construction, and maybe some detail work?

Also, I would love love to happen upon some kind of entry-way table, like these . . .


. . . and a metal bar cart, like this (since my lovely sister nabbed our grandma's!).


Sincerely, your project-starved patrons,

Kristin (and Chris)

Thursday, April 12, 2012

Mini-Yummy

I feel like "mini" food is all the rage right now. Or, at least that's what Pinterest seems to be telling me with the mini-mac & cheese, itty bitty cinnamon rolls, mini cannoli pastry cups, and these scrumptious looking bacon cheeseburger bon bons, mmmm. Seriously, they look delicious.

Anyway, I decided to try out one of these mini recipes after Chris brought home a bag of apples. A whole bag of apples. I love apples, but a whole bag seemed like a lot of apples to eat. I decided that the only way to eat them before they started to spoil was to make a dessert, mini apple pies from Pinterest, of course, to be exact. (I mean, eating a dessert makes more sense than actually eating all of the apples, right? Right.)


The mini-apple pies tasted like a regular apple pie. They weren't anything fantastic, but a regular apple pie is still super yummy! Plus, these mini pies were fun and easy to make and I can imagine that these can be completely customized depending on your apple-pie desires. I know I will be making them again, so without further adieu, here's the recipe . . .

Mini Apple Pies (via Little Bit Funky):

Let me preface this by saying that the original recipe made 24 pies. I only made 8. The recipe below is for the 24 pies because I figured that if you wanted to many this yummy mini dessert I would let you decide how many pies you wanted to make and change the measurements yourself! (Plus, I hate doing math, especially measurement math!)

Ingredients:
  • 8 cups of apples - peeled, cored, and chopped into 1/2in. bits.
  • 12 tablespoons of flour
  • 1 1/2 cups of sugar
  • 4 teaspoons of cinnamon
  • 1/4-1/2 teaspoon of nutmeg (depending on how much you like really)
  • 4 tablespoons of chilled butter cut into 24 equal portions
  • two boxes of Pillsbury pie crusts (four chilled NOT frozen crusts)
Directions:
  1. Peel, core, and cut up the apples. I used my food processor for this part because I hate chopping up stuff and, I'm lazy, what can I say?
  2. Mix the chopped apples with the flour, sugar, cinnamon, and nutmeg. Make sure the apples are well coated!
  3. Unroll the pie crusts and cut several circles out. Continue this until you have enough crusts. The original recipe says that she found that a wide mouth mason jar ring worked perfectly, but I preferred to use a Shakespeare's cup!
  4. Spray a muffin pan with some kind of non-stick cooking oil. Then, line each cup of the muffin holes with the cut-out pie crusts. The original recipe mentioned that pinching the edge of the dough around the top edge of the tin and making a hammock of sorts worked really well. 
  5. Then gently fill the crusts with your apple mixture and push the crusts down the rest of the way. You should be able to fill them until they are slightly mounded. 
  6. Put a dab of your equally-portioned pieces of butter on each mound.
  7. Cover as desired with the leftover dough bits. I even cut little slits in the top to mimic a real pie!
  8. Brush with melted butter and bake at 400 degrees for 18 to 22 minutes. (I went about 25 minutes).
Voila! You have the perfect mini All-American pie!

Just a few randoms thoughts/tips too - First, I wish I had had some vanilla ice cream or whipped cream to go with it. Yummy! Also, if you want to reheat them later, 20-30 seconds in the microwave seemed to do the trick to warm them back up to that gooey-apple-pie goodness! Enjoy!!


Tuesday, March 13, 2012

Winter Pinterest Challenge: More Map Love

Last summer, two of my favorite blogs, Young House Love and Bower Power, started a Pinterest Challenge where they took inspiration from stuff they had "pinned" and actually made it for themselves. As Sherry from YHL aptly puts, "It’s a welcome slap of stop-pinning-and-start-doing." I completely and totally agree. I've probably only done a handful of the projects that I've pinned on my Pinterest boards, even though I keep pinning away pretending that one day my house will be filled with projects of Pinterest-inspiration. This time though, instead of just looking at everyone else's cool projects (and pinning those!), I decided that I was going to participate in the Pinterest Challenge too, and make some pins a reality! So, here it goes . . .


As you might have guessed, I've been obsessing over map-related DIY projects. More specifically, some cork board travel maps . . .


This first one by Life Blessons initially caught me eye because of it's simplicity, and I adored the "our adventures together" banners across it! And then, I fell in love with this second one by C.R.A.F.T. because of the bold blue ribbon and the black outlining of the states. I can't imagine the amount of patience it took to do that detail, my goodness!


I've been contemplating doing my own version of this project for a couple of months, but couldn't really decide exactly what I wanted to do, that is, until I found a Cavallini U.S. map, similar to this one, in our attic a week ago!


I know it came from Paper Source, but I honestly don't remember ever buying it. I want to say it was leftover from Chris' old college apartment and that we've just been lugging it around all of these years. I'm so glad that neither of us threw it away! I guess it isn't a bad thing to be a pack-rat after all (right, Dad?!) - our trash has become our treasure!

So, this weekend while I was at Target I picked up some cork board. I had planned on just getting a regular framed cork board, but I saw a set of 4 square cork board pieces and decided I would glue them together to fit the map size instead. At a little over $7, compared to $15 for the framed board, I couldn't pass up this super easy, and cheaper, option.

So, I started by gluing all of the pieces together with my trusty hot glue gun . . .

004

And then trimmed off the excess cork board to fit the shape of the map . . .

006

Next, I pulled out some old spray adhesive and rubber cement to glue the paper onto my cork board. Now, when I say "old," I mean old. I think the rubber cement dates back to my high school art class. Again, it's okay to be a pack-rat! Just for your information too, I rubber cemented the corners and edges of the map and then glued the rest of it down with the adhesive spray, and I really only did that because there wasn't enough of both to do the whole thing (it's finally time to get some new rubber cement!).

Now, at this point I couldn't decide whether I wanted to keep the rectangular shape, or cut out the shape of America. Since I am the WORST at making decisions, I decided to keep it as is. I can always trim it later, but I can't add it back, you know?

Finally, I hot glued some ribbon onto the back, tied it in a bow, and hung it up!

pinterestmap2a

pinterestmap1

Oh, and of course I added pins everywhere Chris and I have been together, which doesn't seem like that many now that I look at all of it! If you can tell, the black pins are places we've lived and the white pins are places we've visited.

pinterestmap3a

Maybe one day I'll add little flag markers about each place like C.R.A.F.T., and maybe one day I'll trim it to the shape of North America. But, in the meantime, I'm going to enjoy this new map in my growing collection and I'm going to relish in a Pinterest project completed! (And, for the cost of the cork board, $7, at that!)

Well, that's my first official Pinterest Challenge project, hope you liked it and hopefully I'll start to do more! Here's the links to the four Pinterest Challenge leading ladies' projects too: Katie's (Bower Power), Cassie's (Hi Sugarplum!), Erin's (The Great Indoors), and Sherry's (Young House Love). Now, I  have some travel plans to make to fill up this map a little more!

Also, I tested out watermarking photos, what do you think??

Wednesday, February 29, 2012

Happy Leap Day!

Since Leap Day only comes around every 4 years, I figured that if I were to blog any day this week, today would be the day. It's a sieze-the-moment-(day) kinda thing, no?

But, I honestly don't really have anything "spectacular" to write about. Sorry. (Well, I do, but it would require posting lots of photos and stuff and I don't have the energy for that right now.) So, I figured why not just give you some random facts about our Washington life, I mean, it's Leap Day!

So, you know how we're training for that half marathon in two and a half weeks? Well, I definitely hurt my IT band on my long run Saturday. Oops. So while I was applying RICE to my knee this weekend I was also doing some online shopping for some new running shoes, a foam roller, and new shoe insoles. Lucky for me, they all came in yesterday, just in time to start breaking them in (the shoes and insoles) and start getting a good stretch on (the foam roller).

If you've never seen a foam roller in action, it's actually really fun. Here's a video on stretching your IT band, but there are other great stretching exercises you can do with it. There are even great ones for your back!


Also, if you haven't already, please please please consider donating to our running cause, Special Operations Warrior Foundation. We're almost to our goal, and every little bit helps. As my little brother aptly put, "we need your help to make it more than just a race." You can find information on it and donate here!

Yesterday not only did I get a bunch of fun running stuff in the mail, but I also got this AWESOME bench that I ordered from Target a while back.

New bench & Teddy

We put it on our second floor landing, which is pretty big and was looking a little sad and empty. It even goes with my seafoam and yellow color scheme up there so it's extra purty! And, as you can see, Teddy jumped on it and made himself at home as soon as we set it up. I don't know what will be on it more, Teddy or Chris' laundry. ; ) Now I just have to decide what to put in it - linens, bath supplies, or first aid stuff. Decisions, decisions.

Speaking of first aid, have you heard of the norovirus? Apparently it's that bug that spread around those cruise ships earlier this year where a bunch of people got sick and they had to dock early, yadda, yadda . . . basically, it's a nasty flu bug thing. Welp, it's striking George Washington University. The same place Chris goes to school two nights a week. He's not sick (yet), but he found out this morning that some of his co-workers are sick with what seems to be that nasty norovirus too. I personally wouldn't mind being sick to take a couple of days off and lay around watching HIMYM and LOST, but neither of us want to be clutching the porcelain throne either, if you catch my drift. We'll see if our immune systems hold up . . .

While I wait for this bug to hit us, I am using my time wisely. I definitely spent a better part of a day re-organizing my Pinterest boards. The more "non-sense" that I see pinned (right, Danielle?) the more I realize what I use Pinterest for - wish lists, home decor, DIY stuff, and a pictographic-recipe book. (Why yes, I am Pinterest-pretentious -watch what you pin!) So, some reorganizing was needed to better align my boards with my interests and needs. For example, I deleted some boards and added new ones. I also divided my Yummy in my Tummy board into three - the original, Healthi(er), and Just Desserts. And, I decided to dedicate an entire board to My Map Fetish, which I've already blogged about. (Follow some of my new boards too!)


Speaking of my map fetish, one of the maps on our map wall decided to fall the other night sending another one crashing down. It's no big deal, nothing broke (thanks to the couch cushioning it all), but it did scratch the wall. Ooops.

So, I think that's enough rambling, don't you? Thanks for listening. For your patience, I'm rewarding you with a super cute picture of Teddy on the new bench. He was pretending he was imprisoned and lashing out at his captors (Chris).

Teddy

Happy Leap Day, everyone! Until next time, February 29, 2016!

Friday, May 27, 2011

Things I'm loving lately...

I know I've been a poor blogger lately, but I thought I didn't really have anything to write about.... Until I found some inspiration from a recent conversation g-chat with my trusty sister and uber-blogger, Danielle. (Thanks, Danielle!)

While there hasn't been too many exciting things going on in my life, there are some things that I've been loving on lately that I thought I could share with all of you:

#1. Insanity. Last summer I was looking for a way to get in shape and get into an exercise routine. I decided to buck-up and purchase Insanity by BeachBody. (You've probably been mesmerized by the infomercials just like I was . . . right?) Insanity has been compared to P90X, however, Insanity uses your own body as the strength training instead of weights and emphasizes cardio (or, so I've heard). The Insanity plan consists of 60 days of high intensity interval training divided into 2 months. Go ahead, you can laugh at the thought of me jumping around my living room and basement to an exercise video dvd, but Insanity is no Buns of Steel (and you really might want to watch the video on that link. Hil-larious!) Last summer, Insanity kicked. my. butt. After the first month of training, I thought I was doing great, and then I hit the second month whose exercises are absolutely brutal (in a good way, of course). I think I tweaked a muscle in my leg doing the half marathon earlier this spring which would hurt when I ran, but I still wanted needed to stay active. So, in true "Kristin" fashion, I decided to repeat Insanity. I've already done about 6 weeks and I feel great. Not only am I feeling and looking more in shape (I think), but I have to brag and say that I'm rockin' my workouts. Sure they are hard, and sure, sometimes my thighs or triceps or lungs are burning, but boy do I feel good afterward. Gotta love endorphins. I'm liking it so much that after I finish the remaining 2 weeks I must just repeat it. Or mix it with half marathon training, or yoga, or dance (see love #4 below).

#2. Green Smoothies. If you follow any nutrition or health blogs or news like I do, you've probably heard of the components and benefits of green smoothies. Basically green smoothies consist of raw veggies and fruit thrown in a blender. Not only are they good, but they are good for you. I've been cheating and easing my way into making real green smoothies with raw veggies and have been using the drink Bolthouse Farms Green Goodness with a little non-fat plain frozen yogurt (with active cultures, thank you Trader Joe's), and then chocolate protein powder. While it's not made with raw veggies and fruit, it's close enough for now and is definitely delicious and nutritious. I've been drinking it directly after my Insanity workouts as a way to get protein and nutrients into my body to recover. Yummy! Maybe I'll graduate to real green smoothies after I go grocery shopping . . .

#3. Pinterest.com. I love Pinterest. One blog that I follow and adore, Young House Love, has posted a few times about Pinterest, so I finally requested an invite to join and see what all the hype is about. And let me tell you, I instantly fell in love. Basically all it is is a collection of mood/inspiration boards of pictures online. So, when I find a great skirt at Gap, or the perfect designer room, I can "pin" them to my Pinterest boards. My favorite board that I've created is "Making My House My Home" where I'm pinning inspiration and ideas to decorate my house. Although, my "Yummy" board is looking pretty good right now... Anyway, I'm such a visual person that it is proving to be a great way to collect my ideas and see the patterns of my styles, likes, and desires. Check out my boards, or, better yet, request to join and follow me!

#4. SYTYCD. Yes, this might be a little over-the-top, but So You Think You Can Dance started Season 8 last night and I am so so so excited! Besides my new found obsession for the Bachelor/Bachelorette, SYTYCD is the only "contest" reality show I watch and I LOVE it. Every time I watch SYTYCD, I get a yearning to dance again . . . swoon. In preparation for this season, I looked up adult dance classes in the area and am prepared to start taking classes this summer just in case . . . I'll keep you posted. In the meantime, watch SYTYCD on Fox Wednesdays and Thursdays 8/7cst. (And, be prepared for some commentary posts about the show from me. I might not be able to resist!)

Anyway, those are things I am loving lately. I'll find more to write about soon. Promise ; )
Related Posts Plugin for WordPress, Blogger...