So, you might remember my dilemma late last summer? At that time, I had just painted our guest bathroom green, to match some candle holders I got on sale at World Market and I pleaded for help in developing a color scheme. Well, I finally decided on a color. But then, I decided that that color made the bathroom look like a circus tent. So, I picked a completely different color scheme. And now that I like the colors, I am still stuck once again! I've mentioned I'm indecisive, right?
How about I start from the very beginning . . . .
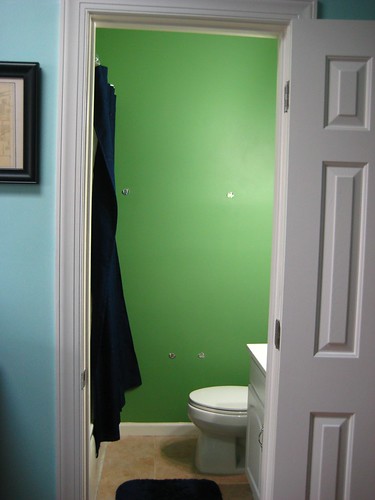
When we moved in, this is what our guest bathroom looked like. Plain jane, with builder beige colors on the wall, and even a glass shower door.
Then, as you might remember, I bought these great candle holders and decided to paint the guest bath green and stencil a color over it. I sought your help in deciding what color to stencil in.
Everyone had great suggestions, but I was still torn on what color to stencil in, so I played around with paint chips and waited. "Waited for what?" you're probably asking. I guess I was waiting for that "light-bulb" design moment where it all makes sense. Needless to say that didn't happen and I was anxious to do something, so I picked a color anyway and went with it.
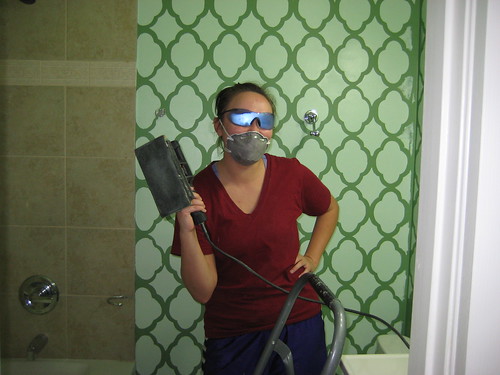
Bad idea, at least when you are doing something as laborious as stenciling. . . For novice-stencilers out there, I would NEVER RECOMMEND stenciling a bathroom as your first attempt at stenciling. Why? It seems so easy, right? Sure, it's really easy to stencil a square or rectangular wall, but throw in tiling, fixtures, toilets, and cramped quarters and you have a recipe for disaster, if not a LOT of frustration.
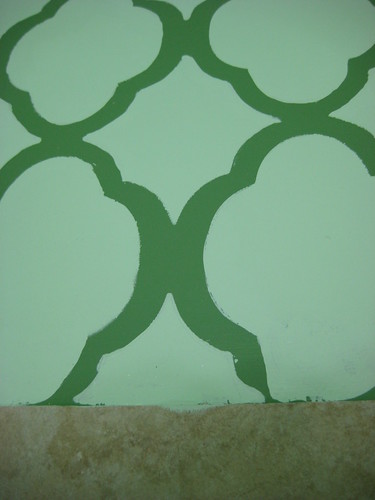
It took me about a month, maybe, and I don't want to even guess how many hours, to stencil this far. (And, oh yeah, I picked a lighter green to stencil, surprise . . . )

You think it looks good, right? Wrong. It looked bad. B-A-D, bad. Sure, from this photo it looks good, well, decent (let's be honest). But up close, like you would be if you were sitting on the "commode," the lines were not crisp and clean at all. Eck!
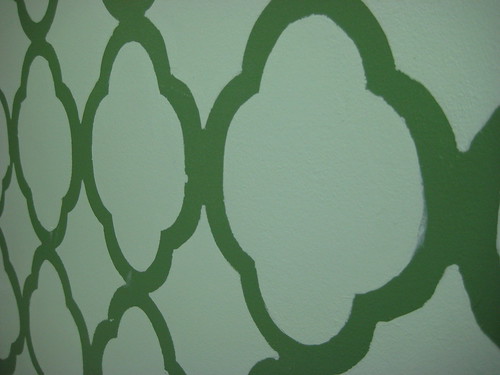
No matter how thinly I put on the coats of paint, it still globbed-up and smeared in places. Then, I had to free-hand the corners and edges because of weird bathroom angles and what free-handing of the stencil I had done looked scare-ry! Eek!
I was finding myself working on it every night after work and all day on weekends. Mind you, all of this work was for a bathroom, and not just any bathroom, but our guest bathroom that I don't even use. Plus, all of those bright colors started to take on a circus-y kind of feel, which is definitely not what I had intended. And, to make matters worse, I was constantly asking Chris if it looked bad and, bless his poor-husband-soul, he would say it looked "okay" while his face looked horrified. Not a good sign, ladies (and gents). Not a good sign at all.
I eventually gave up. It was too much work and had tested the limits of my decorating- and DIY-patience. I needed to step away and wait to be re-inspired.
In the meantime, I moved on to other home projects - like hanging up new dining room art, having fun with some chalkboard paint in our kitchen, painting chevrons in our guest bedroom, and even planning our master bathroom decorating.
FINALLY, the design-lightbulb flickered in my mind (just flickered) and I realized that I wanted similar color schemes in our second-floor hallway, guest bedroom, and guest bathroom because as you walk up our steps you see all three. I wanted them to be cohesive and not clash. I didn't want a cornucopia or rainbow of color to blind my guests, or me, but something that was complimentary.
As you might remember, our guest bedroom is already yellow and white with turquoise/seafoam accents. So, I once again went back to this color scheme that, for us, is equal parts sophisticated and fun. (Thank you, Pinterest and Oh Hello Friend!)

I can't seem to get away from yellows paired with seafoams and white. Thank goodness seafoam/aquamarine is the color of the season!
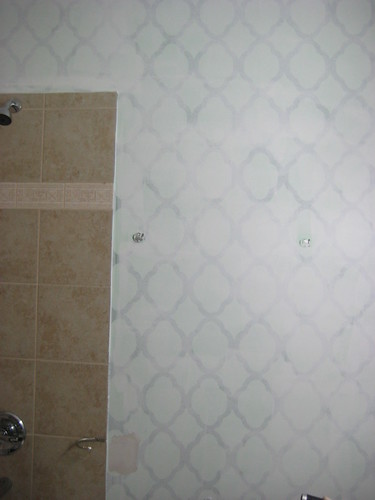
So, I decided to paint over the green, and the stenciling, and start completely over. I sanded the walls to smooth out the stencil lines and then primed (it took a good 4 coats). Trust me, for a room as small as a bathroom it was still very time consuming and I cannot believe I decided to start over!
 |
| Sexy, right? |
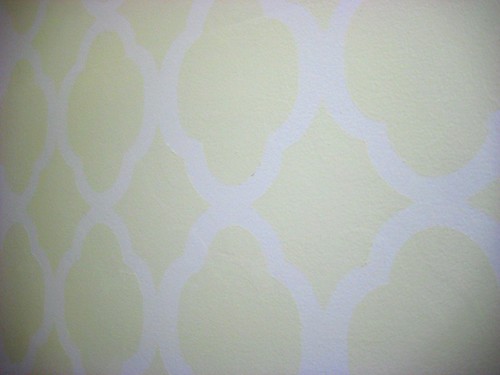
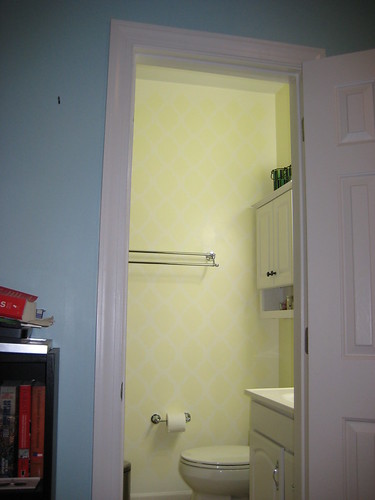
I ended up painting 3 of the walls Behr's Capri Cream (light yellow), and the focal wall Behr's Cotton Fluff (off-white).
Then, I stenciled just the focal wall, to avoid the stupid corners and edges, in the same Capri Cream/yellow color. Stenciling just the focal wall was the best decision ever since it only took a day to complete! And, I think it looks pretty gosh darn good . . .
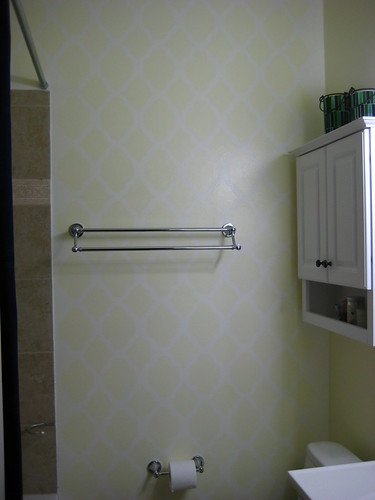
I actually love how faint the stenciling looks - not only does it kind of give a honey comb look to the wall from far away, but it also hides some of my stenciling mistakes!
And, I really really love how pretty the yellow bathroom looks with our seafoam/turquoise-y hallway walls!
The lesson I learned from this experience is two-fold - 1) Stenciling is hard; 2) But things can easily be painted over (it might just take some sanding and a whole gallon of primer)!
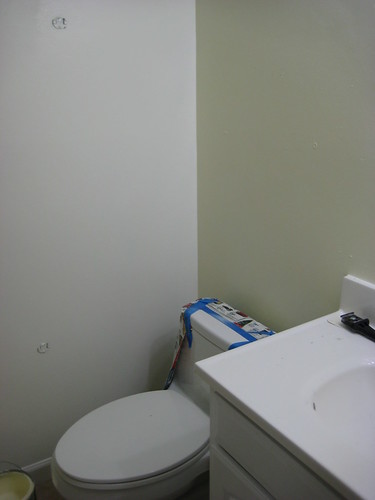
So, at the beginning of this post (and probably 15-minutes-worth-of-reading ago if you made it this far) I mentioned how I am stuck once again, and it's pretty obvious from these photos that the bathroom is sparse and needs some accessorizing. I'm the process of brainstorming some ideas to share with all of you, but I figured that this post was long enough, so, details on that are to be continued . . .
(And, in case you are wondering, I used the Rabat Allover Stencil from Cutting Edge Stencils)
Looks awesome! I like how light it is
ReplyDeleteLOVE the new stencil job. I admit, the original was a little scary...
ReplyDelete