One of our #1 requirements when we were house-hunting was to have some kind of a backyard, or whatever kind of a backyard we could get in the city. We knew it was a long-shot in finding a place with enough green space to warrant a real lawnmower, but Chris really just wanted a back "yard" to plant some herbs, relax on our adirondack chairs, and grill. That's really it. We eventually ended up putting a contract down on a short sale house that had absolutely no backyard. Imagine that. But, thankthegoodness we got tired of waiting on that short sale and fell in love with our current house, because it has a nice little backyard patio! No grass, but areas to plant some things, to sit in our chairs, and grill!
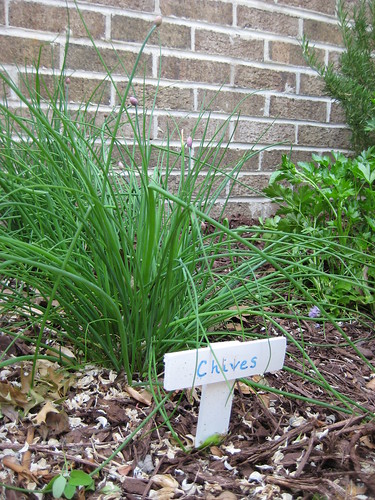
Last year, we worked on converting some of the greenery on the patio from bushes and flowers into a little herb garden of rosemary, chives, sage, parsley, dill, and oregano. It was our first time "gardening" and we definitely learned a lot. For example, did you know that dill grows out of control? Oops.
So, this year we decided to be a little more methodical in approaching our little herb garden, aka, not planting everything in the ground and giving them free reign to grow! I had been inspired by others' garden projects that I found on blogs and
Pinterest and thought that something similar would be perfect for our little "yard"!
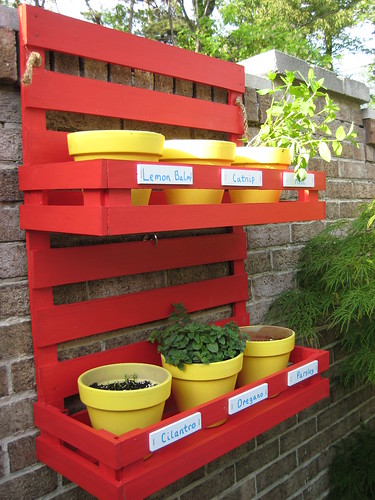
I figured that making some kind of vertical garden to hang on the brick wall at the back of our patio would not only hide the ugly, and boring, brick, but it would also make our herb plants inaccessible to the little herd of alley cats we got going on in our neighborhood. As you can guess, it wasn't hard to convince Chris to do a projects that required measurements and using tools either!
First, let me say that you can obviously literally do a vertical garden however you want, just look at those ideas that I found. They can be hung, stood, or leaned on a wall. It can be made of clay pots, mason jars, and even gutters. It'd be perfect for people who want a little planter garden in their huge yard, and even better for those of you with tiny apartment balconies. It's really what works best for you.
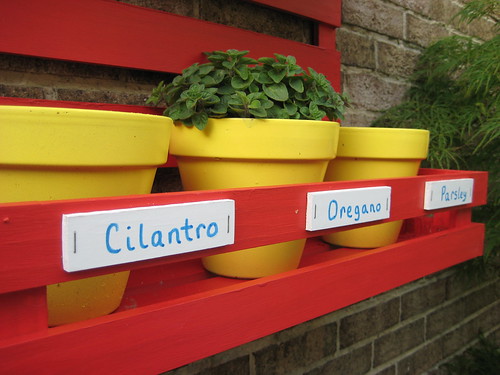
What we decided to do was hang ours on the brick wall at the back of our patio. We used clay pots we bought last year, some pine boards we picked up from Home Depot, "L" brackets to hold it all together, a little paint to make it pretty, and some thick rope to hang over the ledge of the brick wall, and voila!
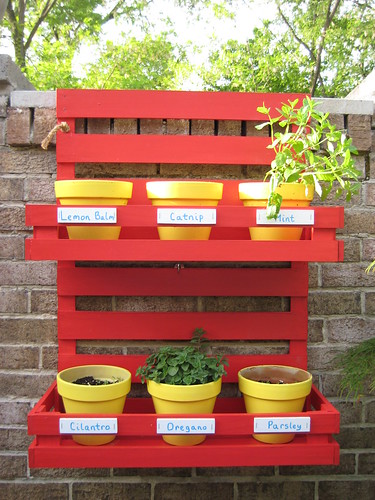

As you can guess, this project was really pretty simple, especially since it was completely customizable. Chris, being the "builder" of our relationship, drew out the plans, gathered the materials, and put it all together based on what we thought would work best for our yard (aka, cover up the brick wall). All he had to do was cut the pine board into the right lengths and screw it all together. He used the "L" brackets to reinforce the shelves to the back so that it could support the clay pots and plants. The shelves may not be that pretty from the inside, because of all of the brackets and whatnot, but the paint and plants cover them up just fine and at least it won't fall apart!
Chris also used some thick rope to hang it over the top of the brick wall. We figured this way it'd be easier to take down to store next fall.
If you want to build a vertical garden just like ours, Chris gave me some pretty detailed notes to share:
Vertical Garden Assembly Instructions. The notes might even be
too detailed, but that's Chris for ya! ; )
Oh, and if you are curious about what I did to contribute to this project, besides being inspired by
Pinterest, I painted the darn thing!
Behr's California Poppy to be exact. It's not the best paint job in the world, but I only used half the quart I bought for it so at least I can touch it up year to year.
And, you might think that I created the cute little plant labels on the shelves, but I didn't, Chris totally did. It was his "idea," so I gave him the supplies (white spray paint and a blue acrylic paint pen) and he went to town with some scrap wood. He even made little label stakes for our herbs in the ground.
Our back "yard" patio definitely looks complete now that we have something fun hanging up on that brick wall. And, in case you are in awe of our awesome Adirondack chairs, Chris definitely built those, from scratch, for us when we first moved out here to DC! (Oh, and those cute yellow and white pillows were from KMart. I'm super proud I found them!)
So, that's our vertical garden. Super simple, but perfect for a second try at our herb garden, even if we don't have a "yard" to plant anything in!
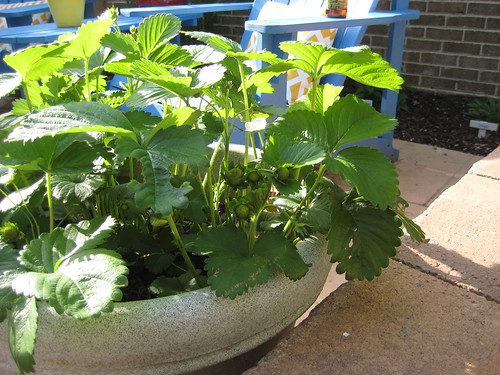
Oh, oh! And, look at these bad boys . . .
Do you see them in that little cluster in the center of the photo? Baby strawberries!! Cross your fingers that our alley cat friends (I'm talking to you Clipper/Homie Half Ear/Socks) don't snack on them before we can!